Hello. I’m ALPAKA. I’ve made the robot, so I’d like to introduce it in the trial stage.
Robot name : Pochi
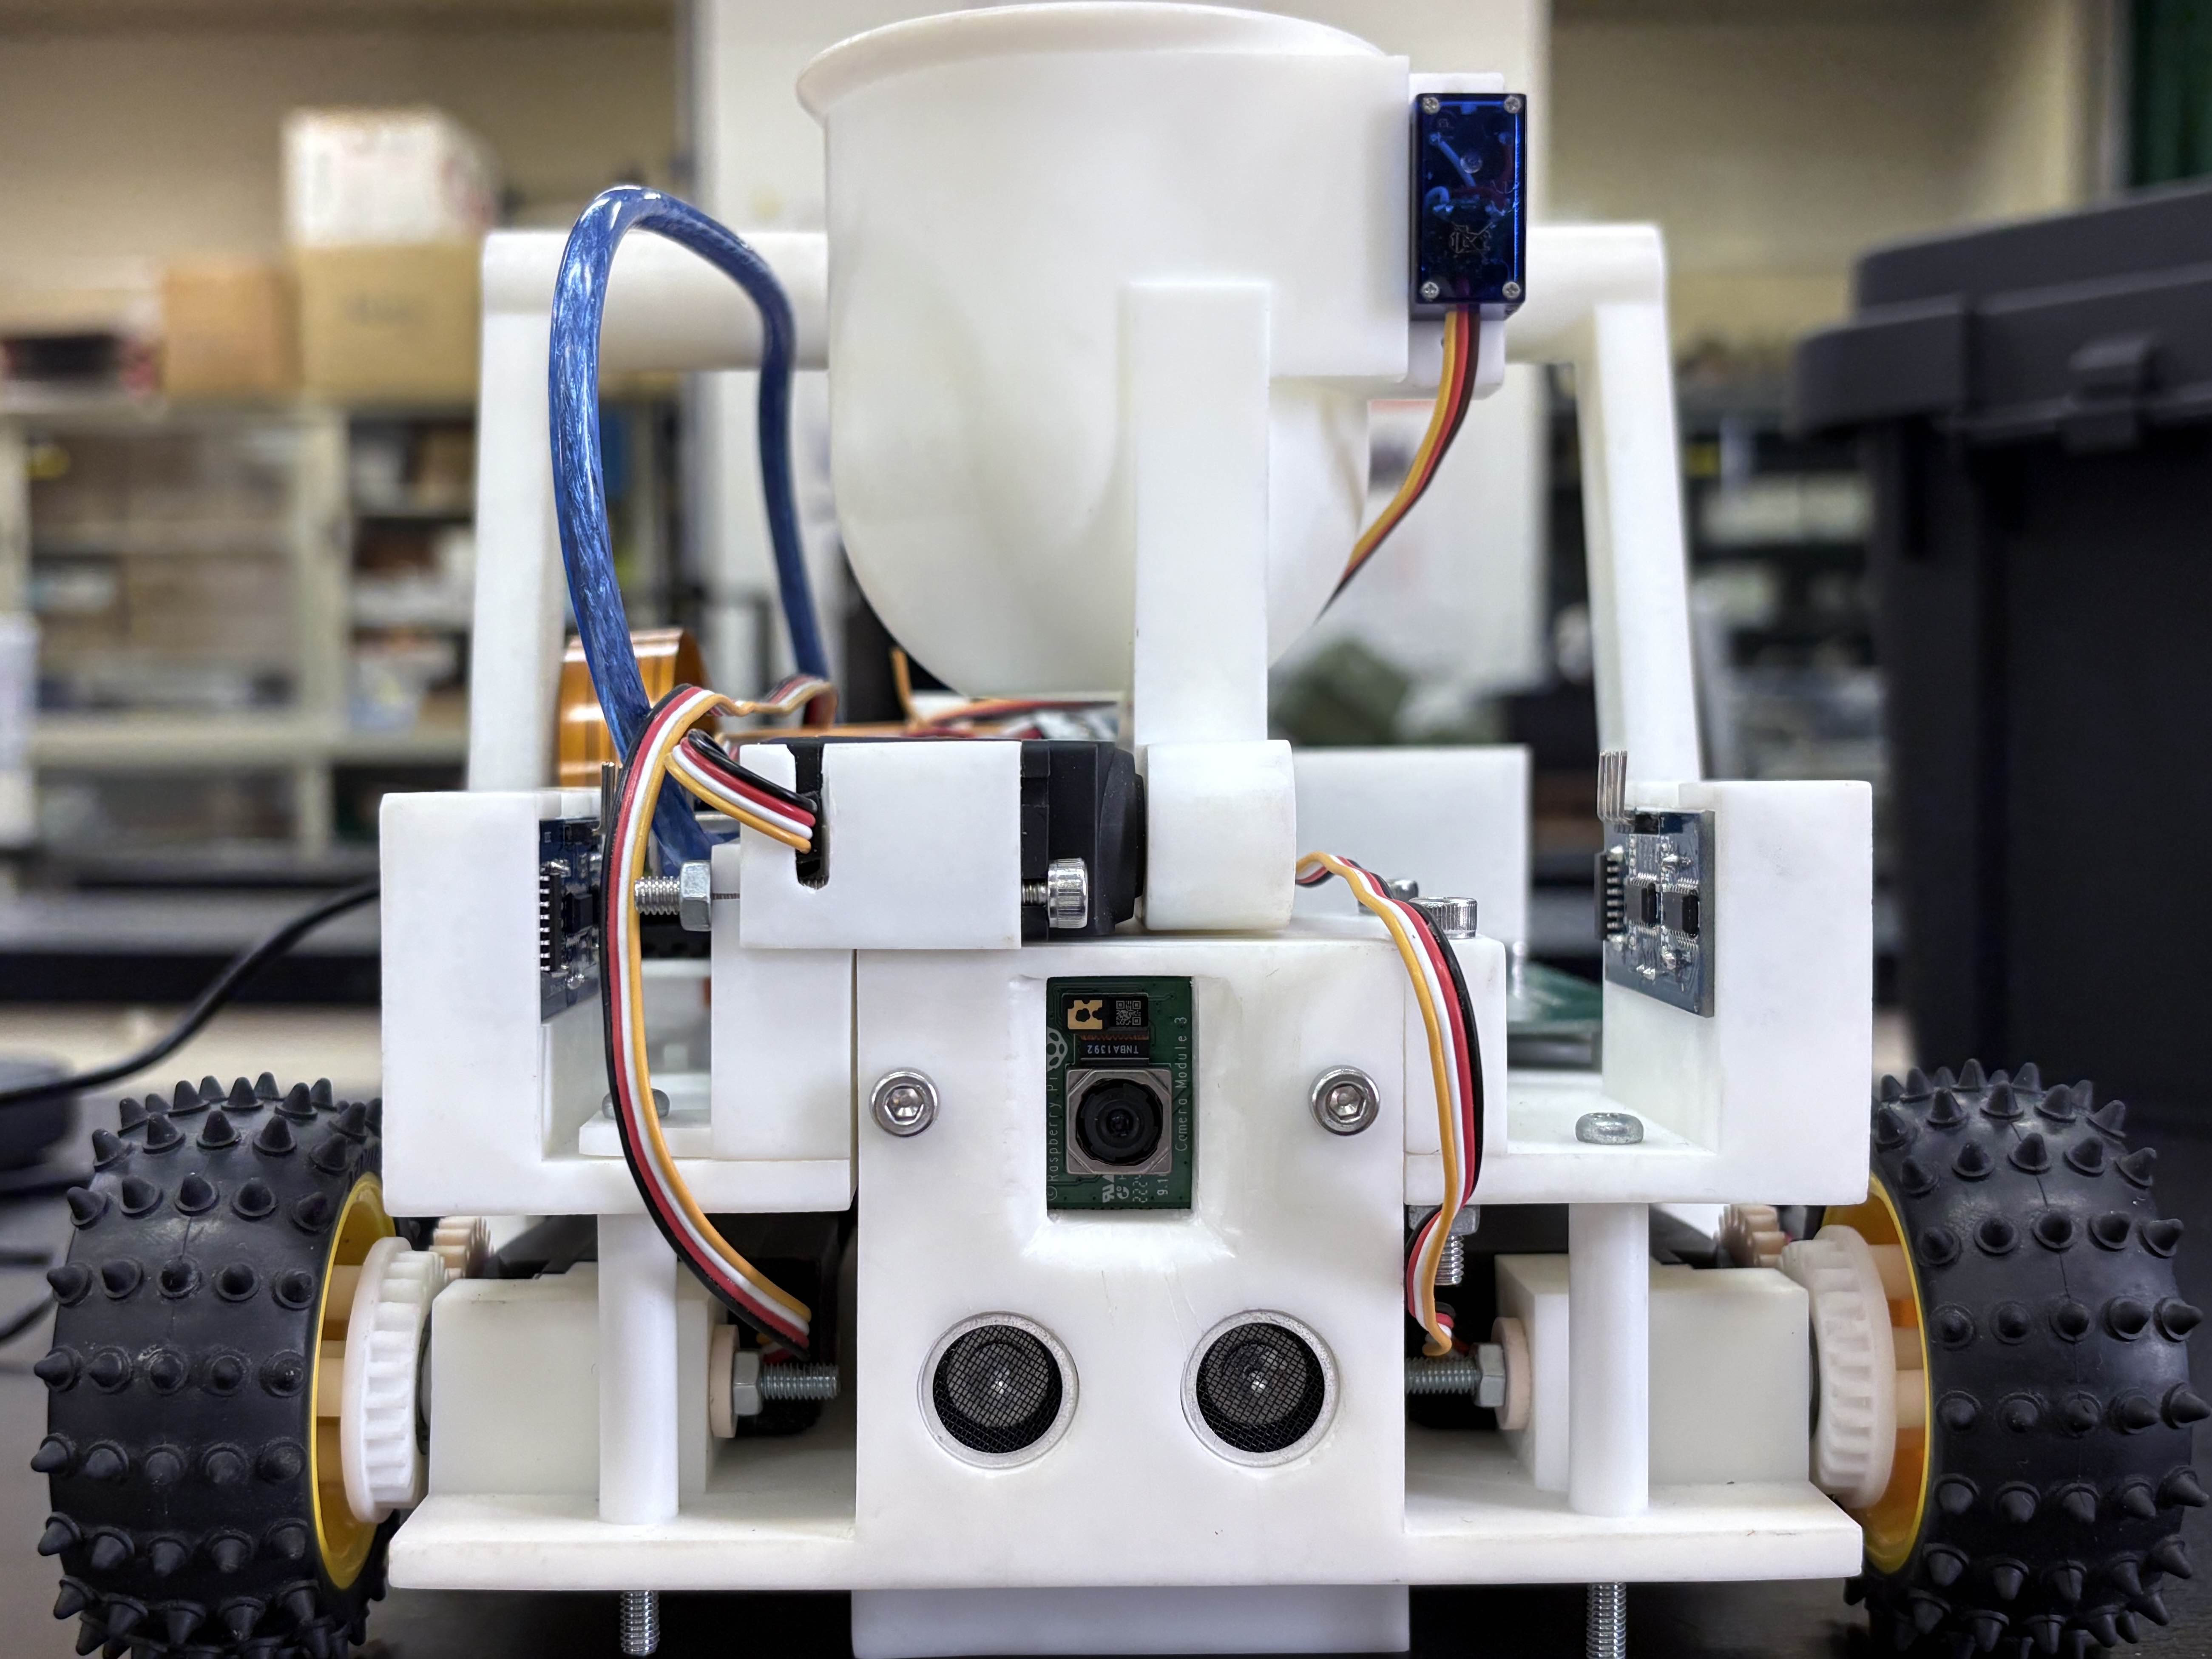
Appearance
First step
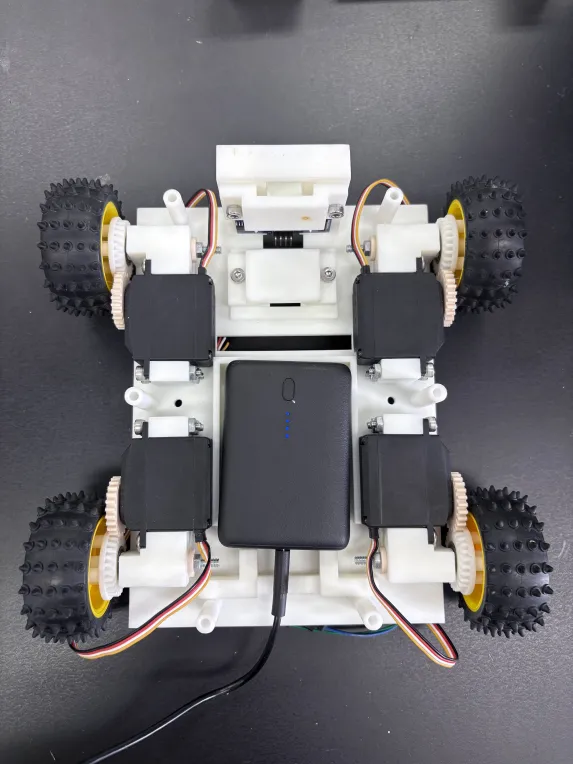
The first step is to place the tires, the mobile battery, two cameras, and the ultrasonic sensor for seeing forward on the 5mm board. Since this robot uses raspberry pi, we decided to place both the circuit and raspberry pi in the second step in order to make the maintenance easy and to keep them close to each other. Also, since we are aiming for low center of gravity, we made the first step as compact as possible.
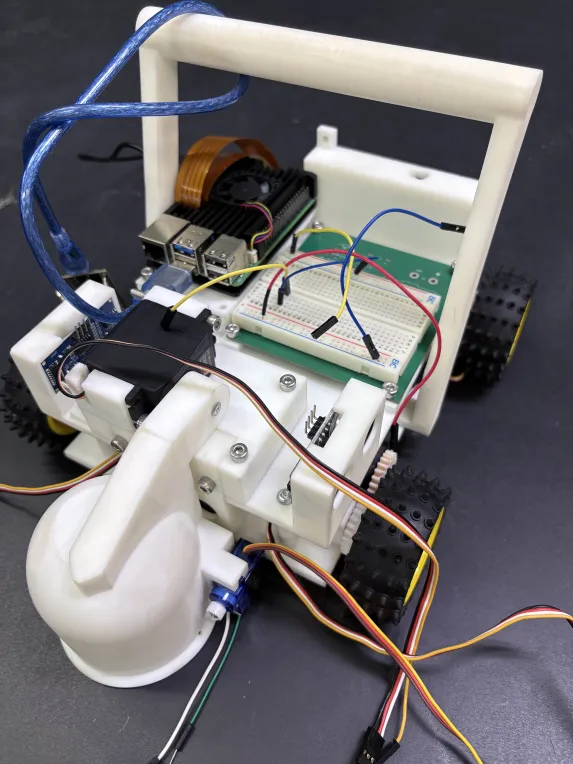
Second step
The second step is to place the raspberry pi, the circuit, the mobile battery, the rescue arm, and the ultrasonic sensors on the left and right. Since the raspberry pi has a screw hole in the heat sink, we fixed it using that. The ultrasonic sensor is friction-fixed at a slightly higher position so as not to interfere with the tire. The second step is also made as compact as possible.
Features
This time, the robot is a self-made machine, not made with LEGO. We made this robot with stability in mind. And, there are three main features:
「Low center of gravity」「AI-based driving」「Latest rescue
Low center of gravity
The rescue line has a height limit of 25cm, but this robot has almost all of its upper half used, and the lower half is almost all used. And, since we put a rather heavy mobile battery in the first step, the center of gravity could be placed at a place 5~6cm from the floor.
AI-based driving
Since the rescue, the cage detection, and the line tracing in this robot are done with AI, we use a raspberry pi and a dedicated camera. Therefore, we have set up a place for two cameras (one for line tracing and one for rescue). However, since the camera for line tracing is placed at a place 2~3cm from the floor, the field of view is too narrow, so it seems that it needs to be placed at a place 6cm from the floor.
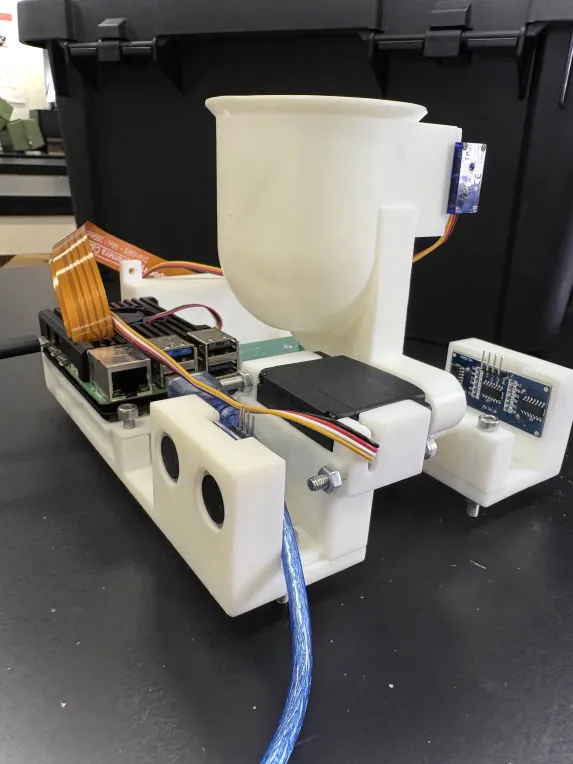
Latest rescue
In addition to using AI for rescue, we also made a rescue arm.
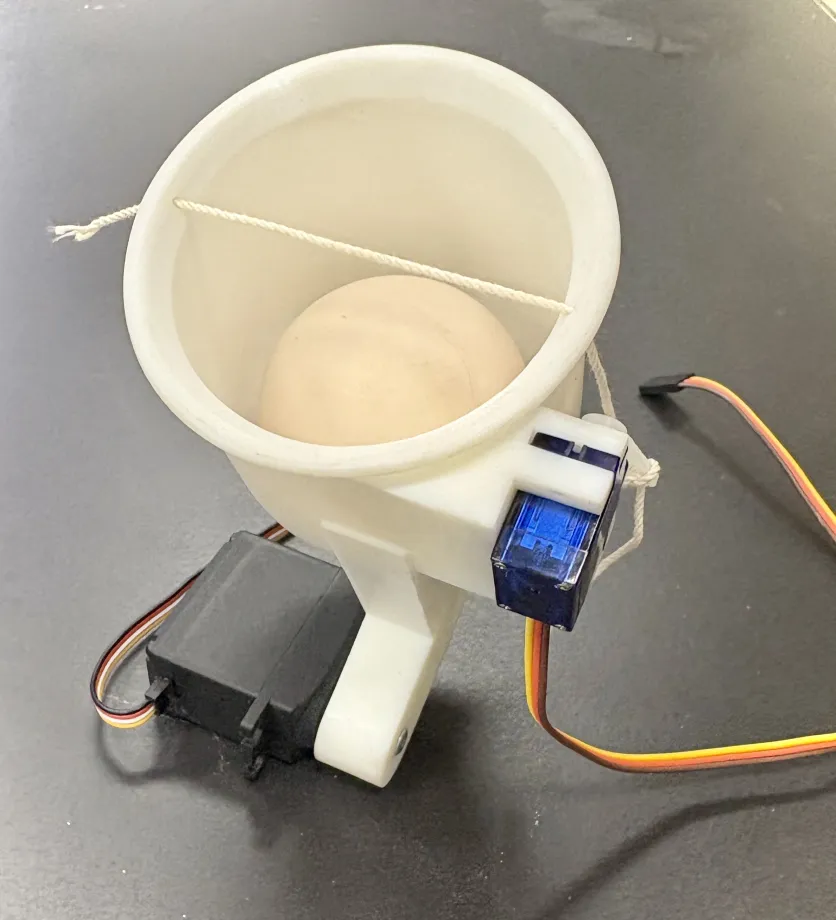
This is based on the mechanism of EvB Robocup.
This arm has a string attached to it, and when the string is loosened, the ball can be placed, and when pulled, the string is stretched and the ball does not come out.
While we cannot carry multiple balls at the same time, we can pick up balls near the wall, so we will aim for a full score of rescue using this.
Finally
Until now, we were doing it with LEGO, but now we are making a self-made robot, so there is a little worry about not being able to change the robot quickly and not knowing if it will move. I want to work hard to be able to run.
thank you for reading